PinScore Pinball LED Display for Williams Riverboat Gambler

PinScore Pinball LED Display for Williams Riverboat Gambler
Click to enlarge (Illustration similar)
This product is currently not available.
Please inform me as soon as the product is available again.

€319.00 *

Prices incl. VAT plus shipping costs

Available in approx. 14 Workdays

  • 04979
PinScore LED Pinball Display for Riverboat Gambler PinScore Part No.: PS-12232-P16-R2 This... more
Product information "PinScore Pinball LED Display for Williams Riverboat Gambler"

PinScore LED Pinball Display for Riverboat Gambler

PinScore Part No.: PS-12232-P16-R2

This PinScore LED display system is a complete, drop-in replacement display system. The low-voltage, high-efficiency displays use only your game's 5-volt supply and will work on pinball machines with failed high voltage power supplies. With custom-engineered color-matched LED (light emitting diode) blocks, the displays retain the game’s factory look while adding features like adjustable brightness and self-test.


This kit contains everything needed to replace displays:

Qty PS No:
Description
1 PS-12232 PinScore master board
2
PS-10866 PinScore 7-digit satellite slave display
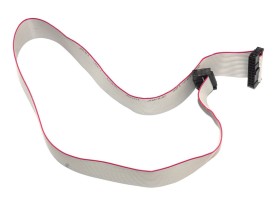
2
PS-CABLE6 26-conductor display cable for PS-10866
2
PS-LS-7 7-digit foam light shield
2 PS-LS-16 16-digit foam light shields

Features:

- Plug & Play installation
- Adjustable brightness
- Low power consumption uses only 5 volt power and no high voltage
- Beautiful black matte finish
- Foam light shields prevent general illumination leakage glare
- Crisp alpha and numeric digits illuminate in original font and color
- 5 year warranty
- Assembled in USA
- RoHS compliant

Compatible Games:

- Riverboat Gambler

Installation Instructions:

  1. Remove Old Displays. Unplug the AC power from your pinball machine. Remove game backglass. Unplug all display board connecting cables and remove original display boards. You may re-use your existing ribbon cables.
  2. Set the switches. The 3 bank DIP switch is labeled SW2 and located near the center bottom on the FRONT of the board. Set the 3 switches using a paper clip or pen point. (ON is UP and OFF is DOWN). No damage will occur if the switches are not set correctly, but the display may show scrambled characters. Switch 1 on, Switch 2 off, Switch 3 off.
  3. Mount the new boards. Hand-tighten the screws so you may align the displays with the backglass windows before permanently securing the boards. If further alignment is necessary, you may adjust the insert panel door hinges and latch in the backbox.
  4. Connect the cables. Attach the original power cables to the board. These are all keyed and will only fit in the correct connectors. Attach the flat ribbon cable that connects to your MPU board to the connector labeled MPU Cable (MPU Cable). Make sure to align the red-striped side of the cable with Pin #1 on the connector, which faces the test switch and is labeled "RED".
  5. Double-check all connections, plug in the machine, and turn the game on. The LED Display will light up. Pressing the diagnostic pushbutton labeled (SW1/DISPLAY TEST) on the PS-12232 board will illuminate all segments of all displays. This indicates that all components of the PinScore System are operating correctly. The thumbwheel brightness control labeled (R10) on the right side of the board allows you to set your preferred illumination level.  


Related links to "PinScore Pinball LED Display for Williams Riverboat Gambler"
Viewed: